Skip to content
WebsitePanelStatus
NolayDocumentation
WebsitePanelStatus
SectionsGetting started: Connecting a server
Getting started
  • Section overview
  • What is Nolay
  • What is a VPS
  • Server requirements
  • Connecting a server
  • First project
Guides
  • Section overview
  • Domains and HTTPS
  • Secrets
  • Tunnel behind NAT
Concepts
  • Section overview
  • What is stored where
Reference
  • Section overview
  • Error codes
  • nolay.toml
Security
  • Section overview
Migration
  • Section overview
Troubleshooting
  • Section overview
Changelog
  • Section overview
Getting started
  • Section overview
  • What is Nolay
  • What is a VPS
  • Server requirements
  • Connecting a server
  • First project
Guides
  • Section overview
  • Domains and HTTPS
  • Secrets
  • Tunnel behind NAT
Concepts
  • Section overview
  • What is stored where
Reference
  • Section overview
  • Error codes
  • nolay.toml
Security
  • Section overview
Migration
  • Section overview
Troubleshooting
  • Section overview
Changelog
  • Section overview
  1. Documentation
  2. Getting started
  3. Connecting a server

Connecting a server

Add a server in the panel, run one command on it and wait for the Online status.

Markdown

After this page the server is connected to the panel and ready for projects. You need a VPS that meets the requirements and SSH access to it.

Steps

  1. In the panel open Servers and click Add server. Give the server a name you can tell apart, for example prod-1, and click Create and get token.
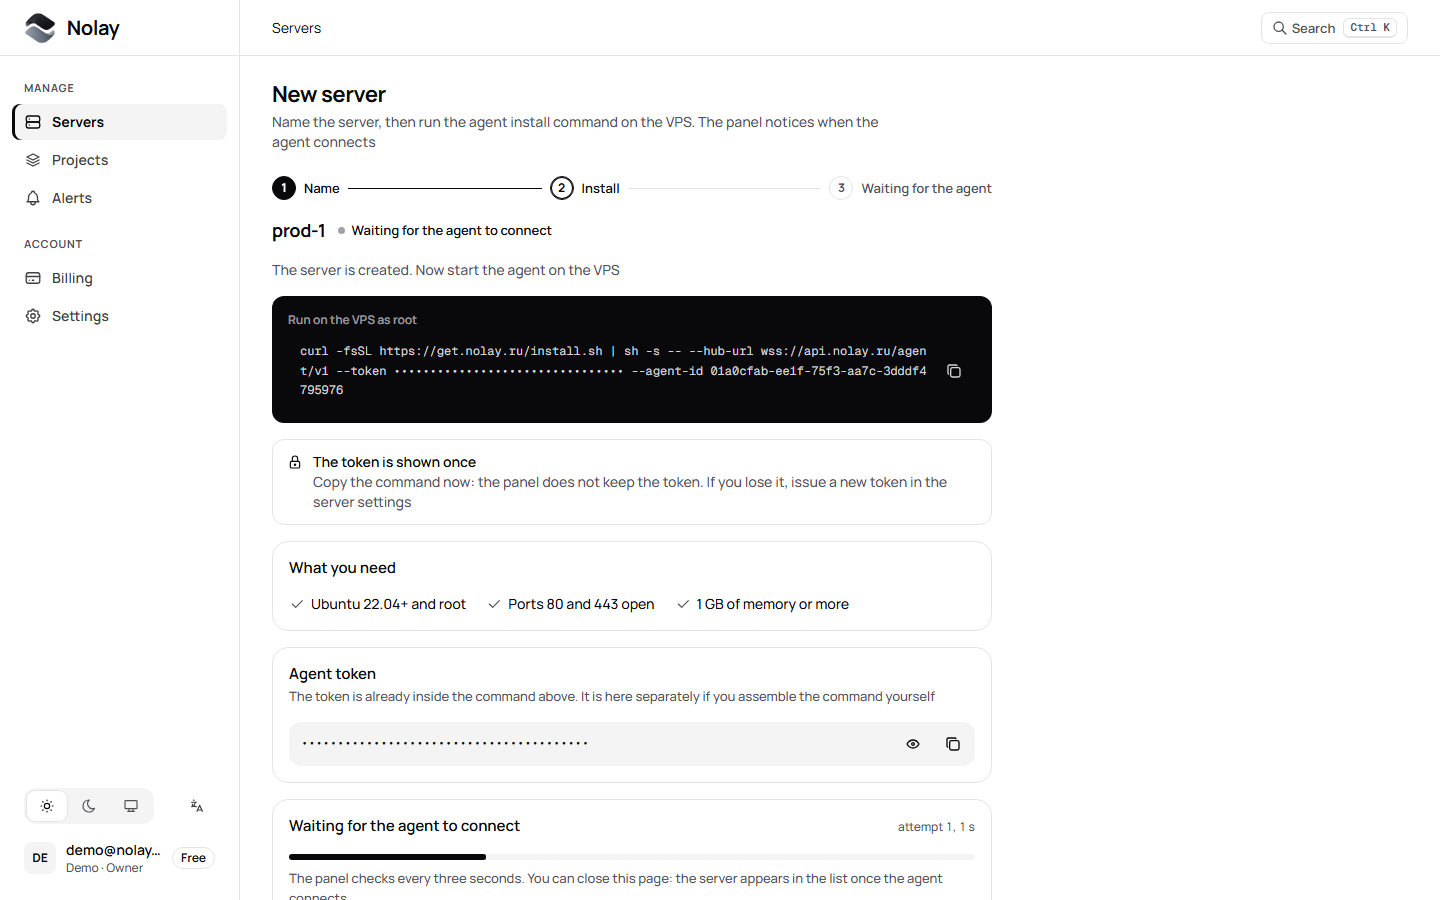
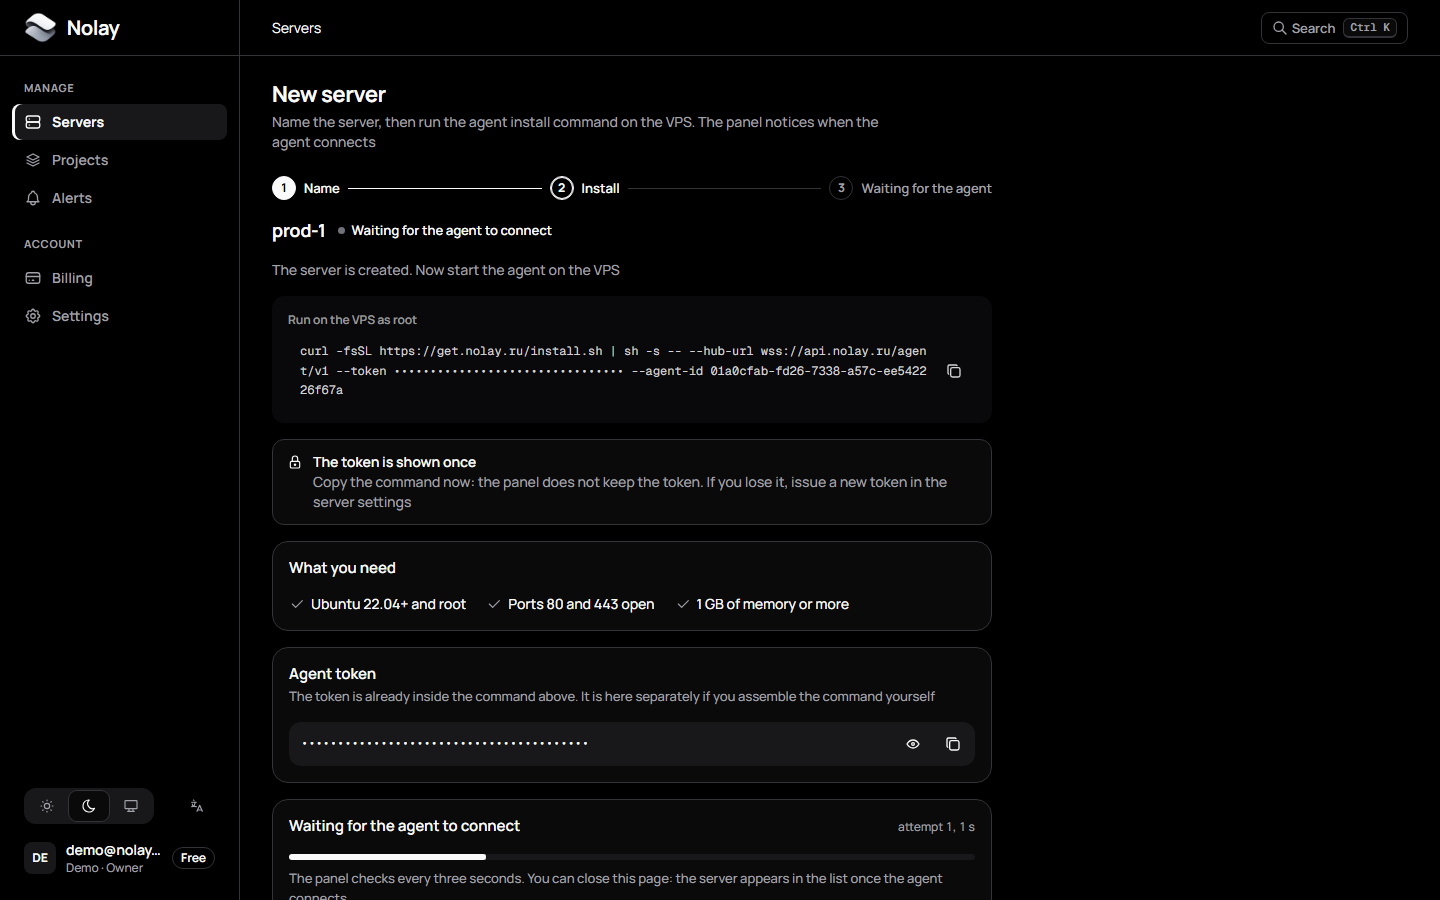
The New server dialog in the panel with the install commandThe New server dialog in the panel with the install command
The Install step: the command for the server and the agent token. The token is replaced with dots in the screenshot.
  1. Copy the install command. It looks like this; the token and ID are different for every server:
curl -fsSL https://get.nolay.ru/install.sh | sudo sh -s -- --hub-url wss://api.nolay.ru/agent/v1 --token <token> --agent-id <uuid>
  1. Log in to the server over SSH and run the command. The installer checks the server, installs Docker and the agent, and prints the agent version and service state at the end. It usually takes two to five minutes.

  2. Go back to the panel. The Waiting for agent step checks the connection every three seconds; once the agent is online, open the server. Its status is Online.

The token is shown once

The panel does not store the token. If the page closed before the install, issue a new token in the server settings and take the new command.

Check on the server

The service is running:

systemctl status nolay-agent

The agent connected to the hub, the log has a line about the connection:

journalctl -u nolay-agent -n 30 --no-pager

The agent opened no inbound ports:

ss -tulpn

Where things live on the server

PathWhat is there
/usr/local/bin/nolay-agentthe agent binary
/etc/nolay/agent.tomlthe agent config
/etc/nolay/agent.tokenthe connection token, mode 0600
/etc/nolay/agent.keythe secrets encryption key, mode 0600
/var/lib/nolaythe agent database, build sources, Caddy certificates

Updating

Run the same install command again. The binary and service are updated; config, data and project containers stay as they were.

Disconnecting a server

Open the server settings in the panel and press "Delete server". The dialog offers three paths:

PathWhat happens on the server
Disconnect serverThe agent stops the project, service and proxy containers and removes itself. Containers, volumes, images and data stay. /var/lib/nolay/export/ gets a docker-compose.yml, .env files and a README.md on how to run the projects with plain Docker
Delete everythingThe agent removes containers, networks, volumes, project images and the proxy, then removes itself together with its config and data. Download the backups you need first. You have to type the server name
Delete selected projectsThe usual project deletion, in a batch, with a "Delete volumes" checkbox per project. The server stays in the panel

If the server is offline or the agent did not answer, the panel still deletes the server and shows the command to run on the server as root:

curl -fsSL https://get.nolay.ru/uninstall.sh | sudo sh                # remove the agent, keep the data
curl -fsSL https://get.nolay.ru/uninstall.sh | sudo sh -s -- --purge  # remove the agent with its config and data

Without the command from the panel, project containers keep running until you stop them. Certificates in /var/lib/nolay/caddy survive --purge as well.

Troubleshooting

What you seeWhyWhat to do
The installer stopped at the checkThe server does not fit or ports are takenLook up the check code in the reference
The server stays OfflineNo outgoing access to api.nolay.ru:443Check the provider firewall and journalctl -u nolay-agent
Code 4003 in the logThe token does not match or was revokedAdd the server again and run the new command

Next

Create your first project.

PreviousServer requirementsNextFirst project

On this page

  • Steps
  • Check on the server
  • Where things live on the server
  • Updating
  • Disconnecting a server
  • Troubleshooting
  • Next
Updated 2026-09-23
Nolay

Nolay documentation: connecting your own server, deploys, domains, secrets.

Documentation

Getting startedReferenceChangelogllms.txt for AI

Product

WebsitePanelStatus
Nolay